Difference between revisions of "Add external CA to trust list"
Pavel.lobko (talk | contribs) |
Pavel.lobko (talk | contribs) |
||
| Line 11: | Line 11: | ||
1. Open required page in Firefox: | 1. Open required page in Firefox: | ||
| − | [[File:Add_external_CA_to_trust_list_step1.png| | + | [[File:Add_external_CA_to_trust_list_step1.png|500px]] |
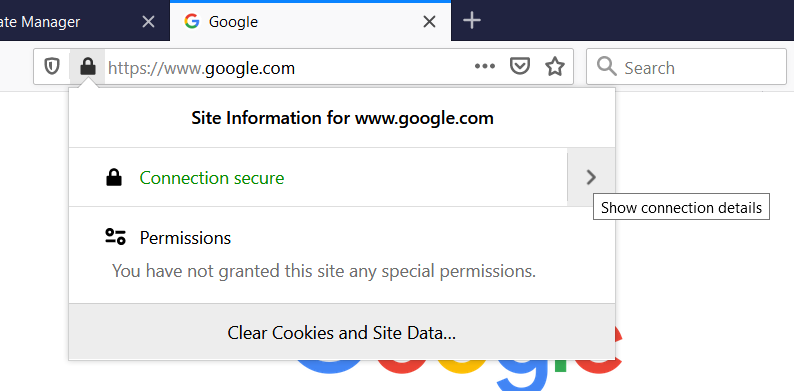
2. Click Lock icon and click Show connection details | 2. Click Lock icon and click Show connection details | ||
| − | [[File:Add_external_CA_to_trust_list_step2.png| | + | [[File:Add_external_CA_to_trust_list_step2.png|500px]] |
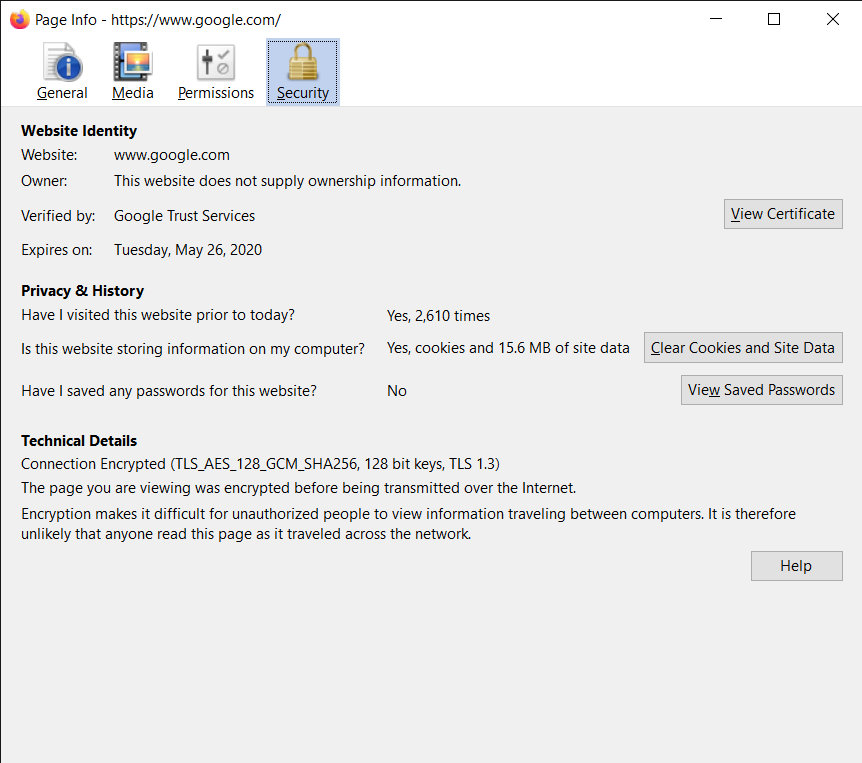
3. Click More information: | 3. Click More information: | ||
| − | [[File:Add_external_CA_to_trust_list_step3.png| | + | [[File:Add_external_CA_to_trust_list_step3.png|500px]] |
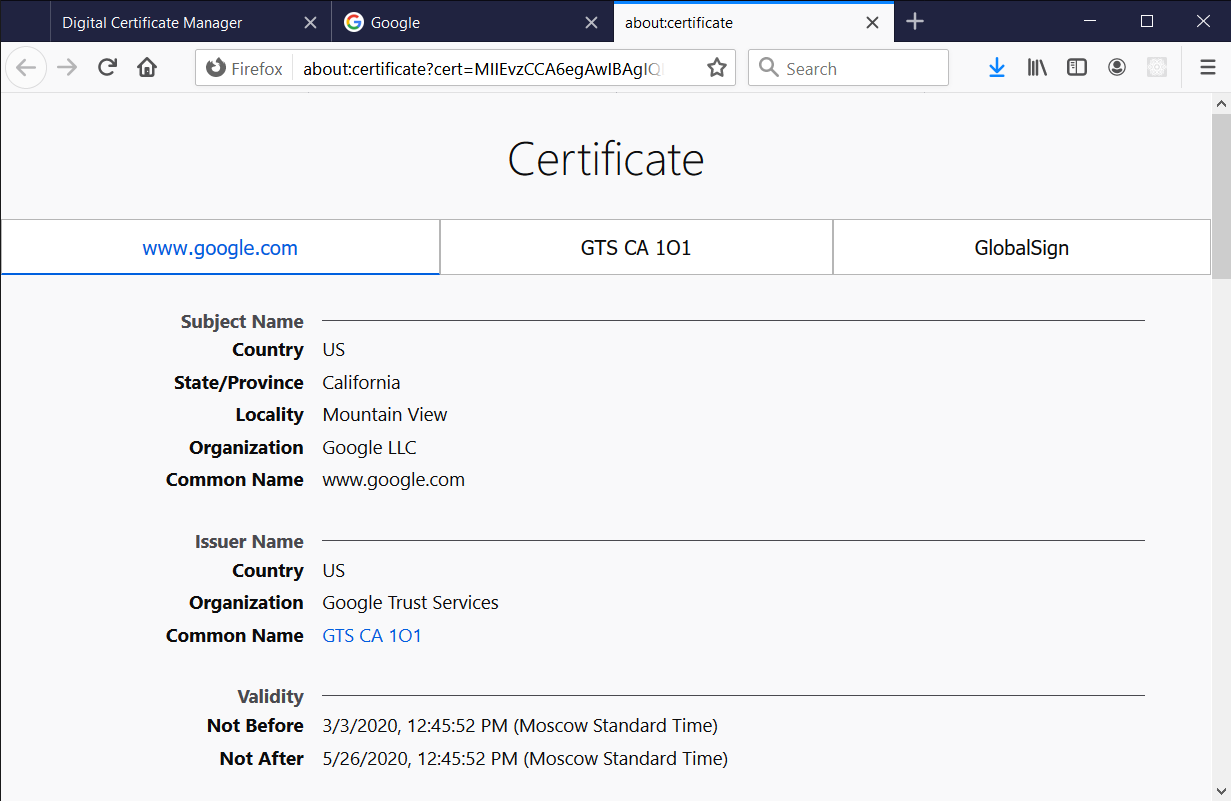
4. View Certificate: | 4. View Certificate: | ||
| − | [[File:Add_external_CA_to_trust_list_step4.png| | + | [[File:Add_external_CA_to_trust_list_step4.png|500px]] |
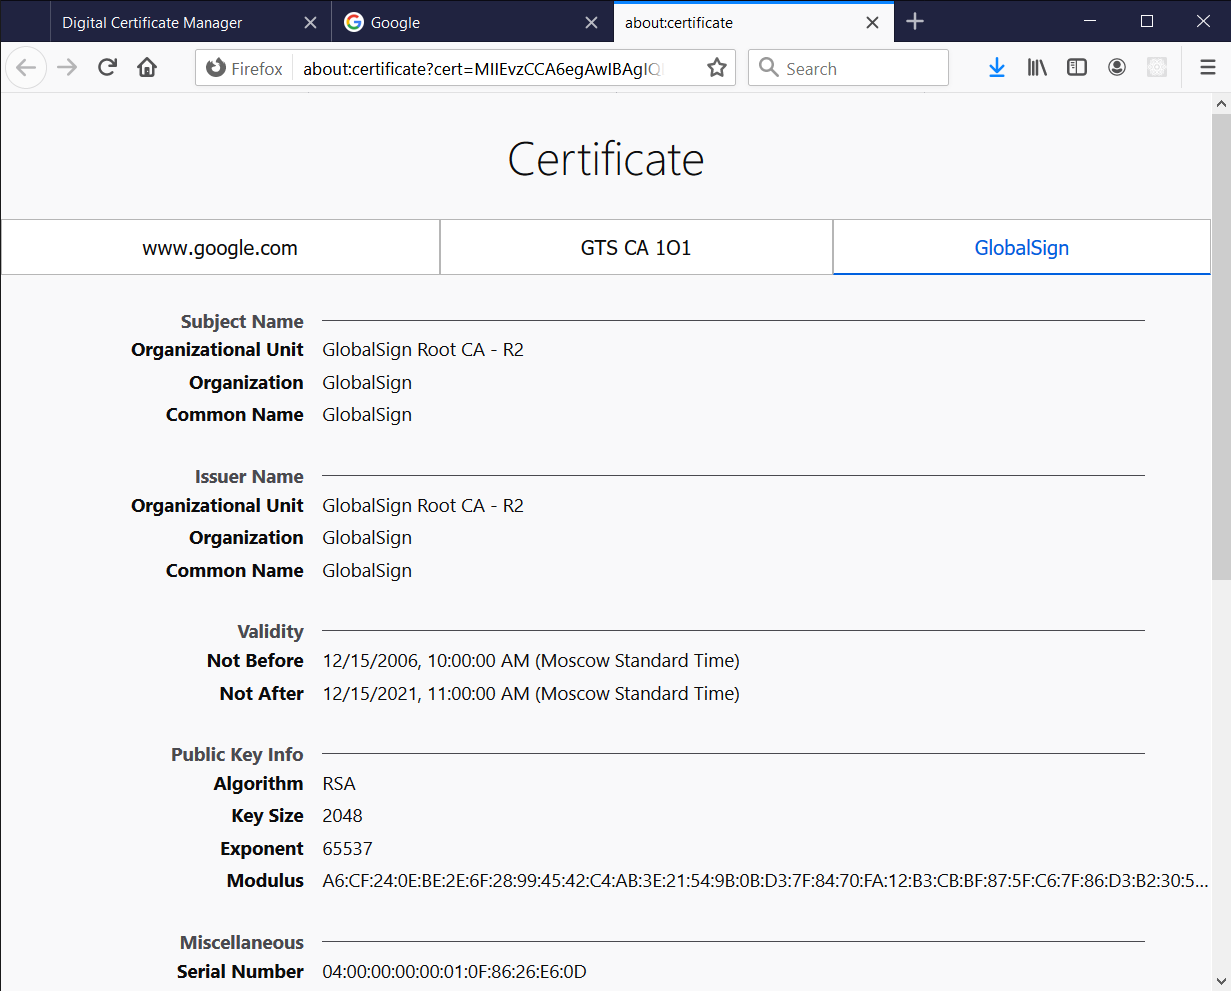
5. Open rightmost tab with root CA authority: | 5. Open rightmost tab with root CA authority: | ||
| − | [[File:Add_external_CA_to_trust_list_step5.png| | + | [[File:Add_external_CA_to_trust_list_step5.png|500px]] |
6. Scroll down and click on link Download PEM (Cert), save downloaded file: | 6. Scroll down and click on link Download PEM (Cert), save downloaded file: | ||
| − | [[File:Add_external_CA_to_trust_list_step6.png| | + | [[File:Add_external_CA_to_trust_list_step6.png|500px]] |
7. Copy downloaded file to your IBM i folder, for example to /tmp/www-google-com.pem | 7. Copy downloaded file to your IBM i folder, for example to /tmp/www-google-com.pem | ||
| Line 39: | Line 39: | ||
9. Go to Manage Certificates and click Import Certificate: | 9. Go to Manage Certificates and click Import Certificate: | ||
| − | [[File:Add_external_CA_to_trust_list_step9.png| | + | [[File:Add_external_CA_to_trust_list_step9.png|500px]] |
10. Select Certificate Authority (CA) and press Continue: | 10. Select Certificate Authority (CA) and press Continue: | ||
| − | [[File:Add_external_CA_to_trust_list_step10.png| | + | [[File:Add_external_CA_to_trust_list_step10.png|500px]] |
11. Enter path to downloaded chain file (at IBM i) and click Continue: | 11. Enter path to downloaded chain file (at IBM i) and click Continue: | ||
| − | [[File:Add_external_CA_to_trust_list_step11.png| | + | [[File:Add_external_CA_to_trust_list_step11.png|500px]] |
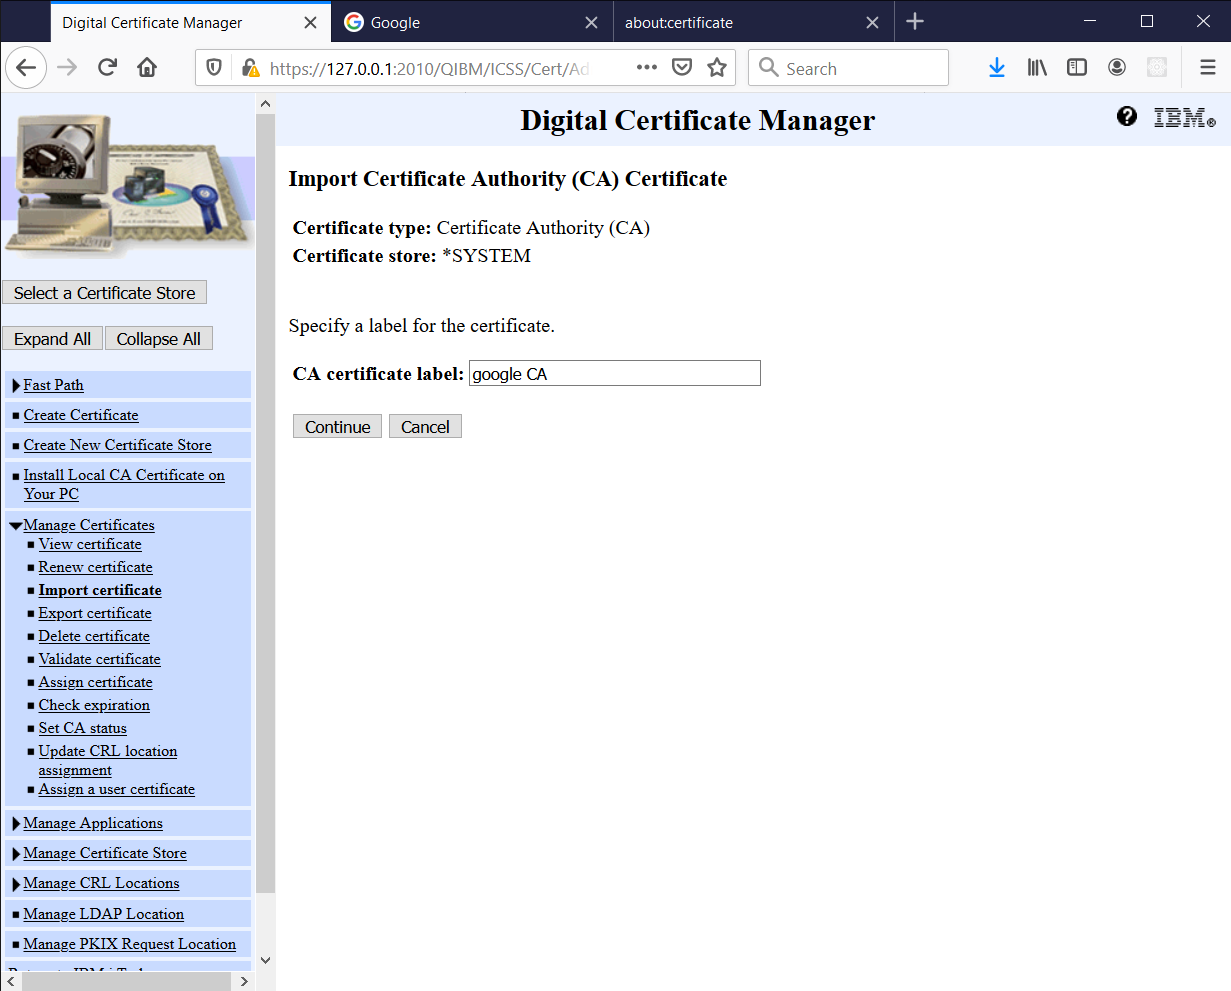
12. Enter certificate label for imported CA (up to you, don't have to be the same as CA common name): | 12. Enter certificate label for imported CA (up to you, don't have to be the same as CA common name): | ||
| − | [[File:Add_external_CA_to_trust_list_step12.png| | + | [[File:Add_external_CA_to_trust_list_step12.png|500px]] |
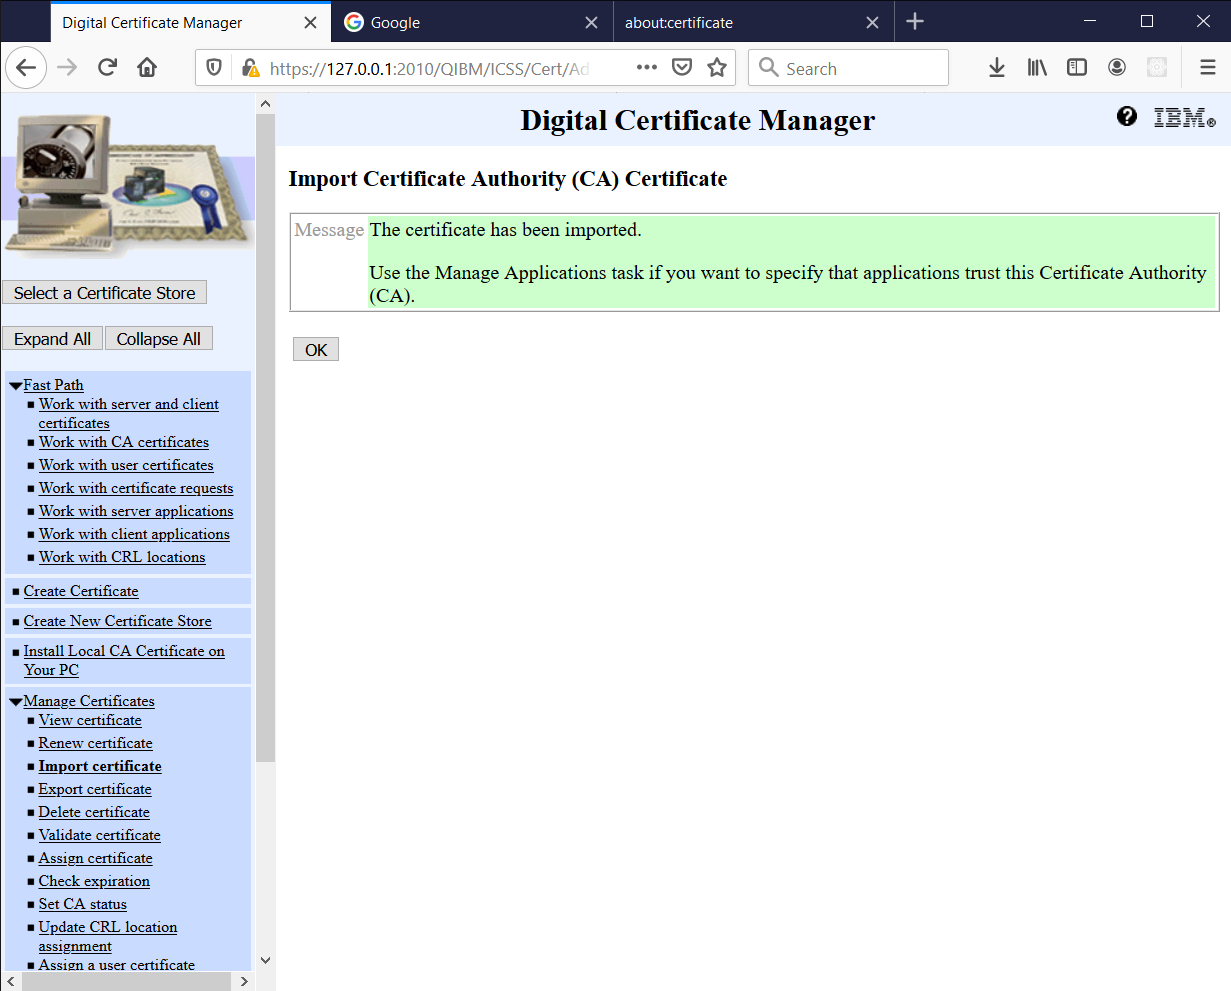
13. Press Continue: | 13. Press Continue: | ||
| − | [[File:Add_external_CA_to_trust_list_step13.png| | + | [[File:Add_external_CA_to_trust_list_step13.png|500px]] |
Certificate imported. | Certificate imported. | ||
Revision as of 10:38, 14 April 2020
When using the i2Rest Client to access external https resources, you might meet error "Certificate is not signed by a trusted certificate authority". In this case you will have to add the root CA certificate of the target server to the list of trusted certificates in DCM.
Here is one of ways to get the server's root CA certificate and register it in the DCM trust list.
DCM requires root CA certificate in PEM format. If you already have such file, you have to save it to IBM i directory and can go to step 8.
Using Firefox:
1. Open required page in Firefox:
2. Click Lock icon and click Show connection details
3. Click More information:
4. View Certificate:
5. Open rightmost tab with root CA authority:
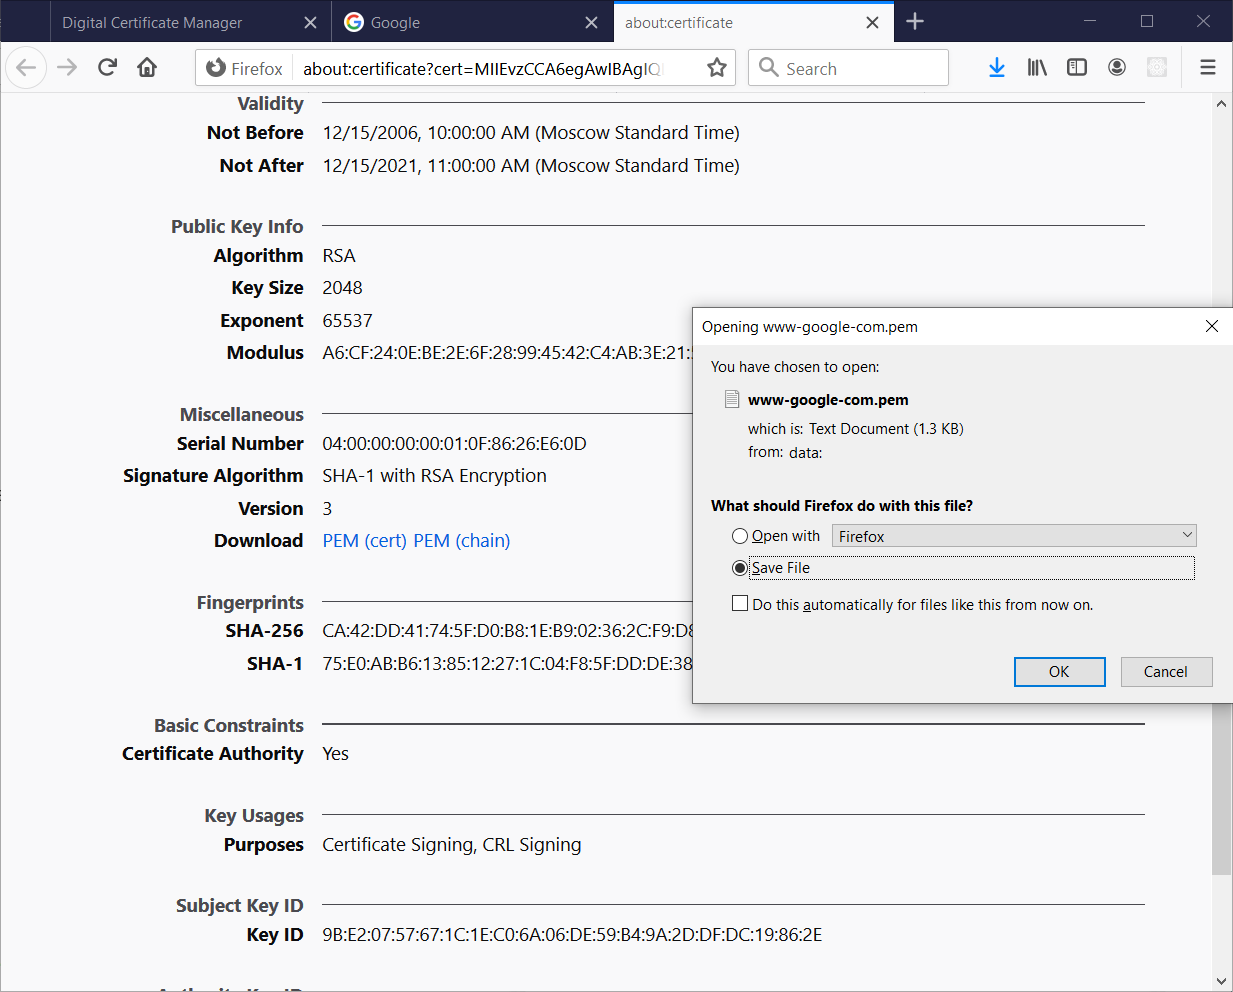
6. Scroll down and click on link Download PEM (Cert), save downloaded file:
7. Copy downloaded file to your IBM i folder, for example to /tmp/www-google-com.pem
8. Close opened page and go to DCM *SYSTEM store
9. Go to Manage Certificates and click Import Certificate:
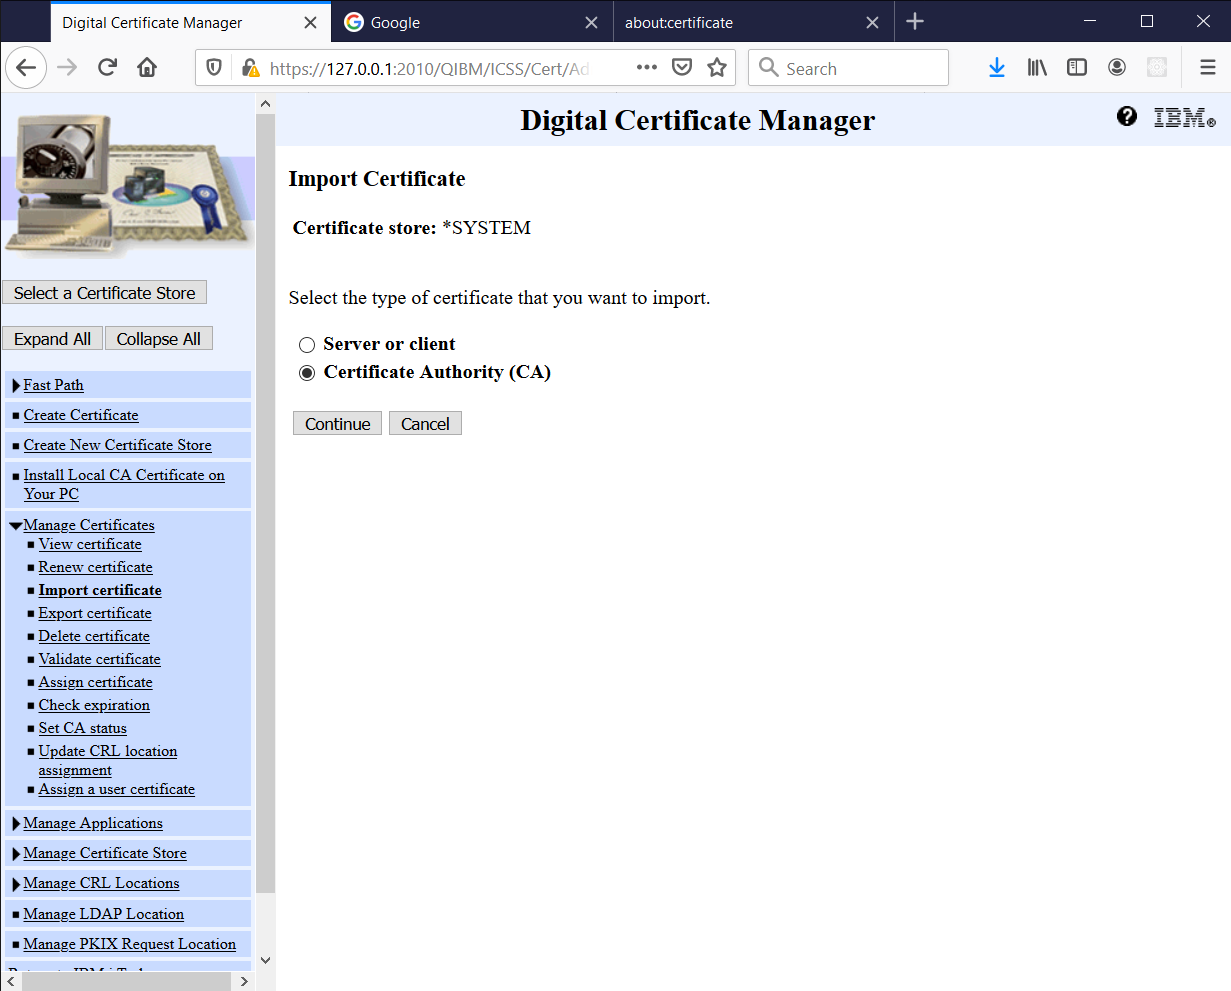
10. Select Certificate Authority (CA) and press Continue:
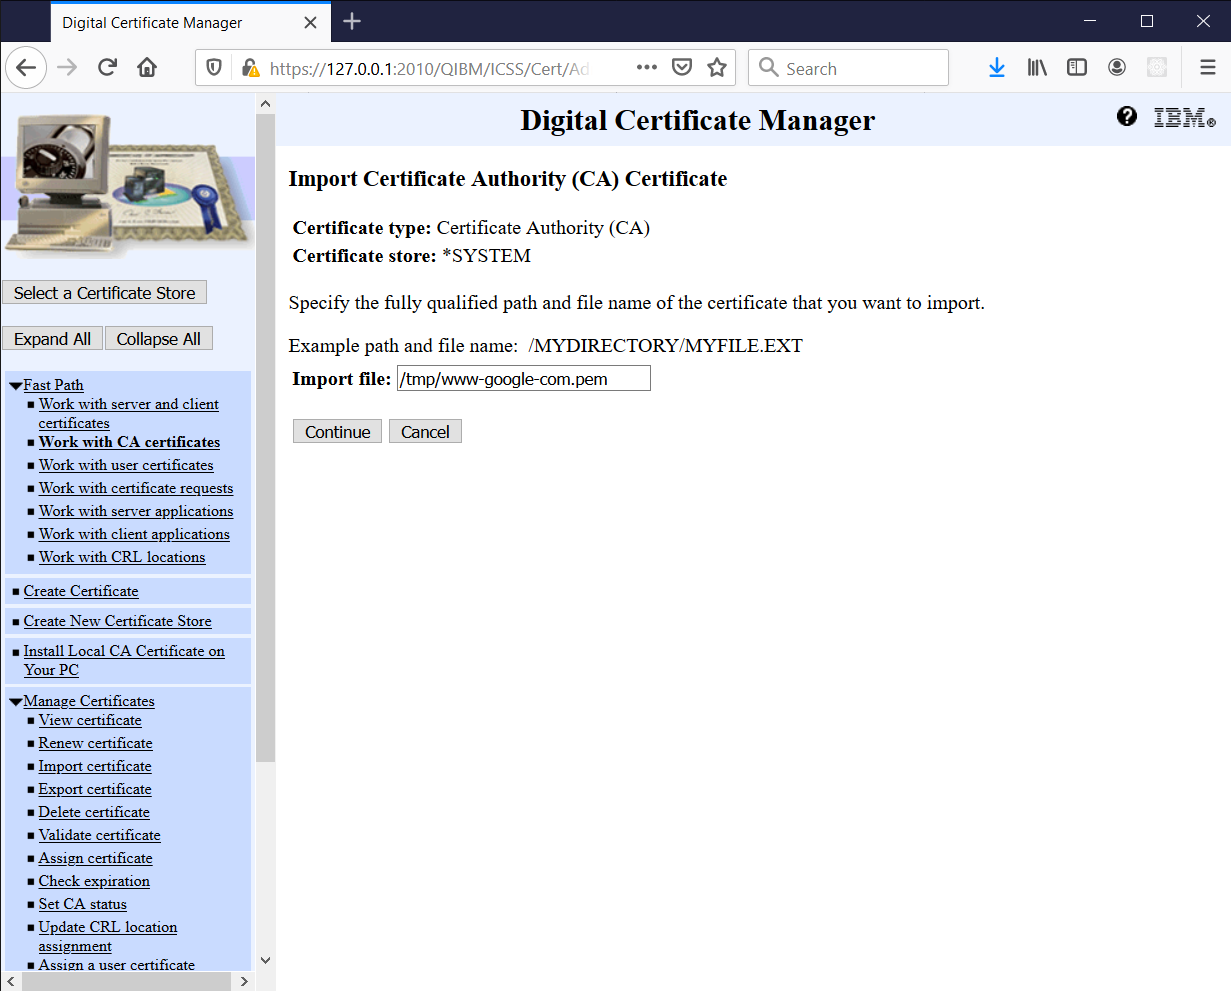
11. Enter path to downloaded chain file (at IBM i) and click Continue:
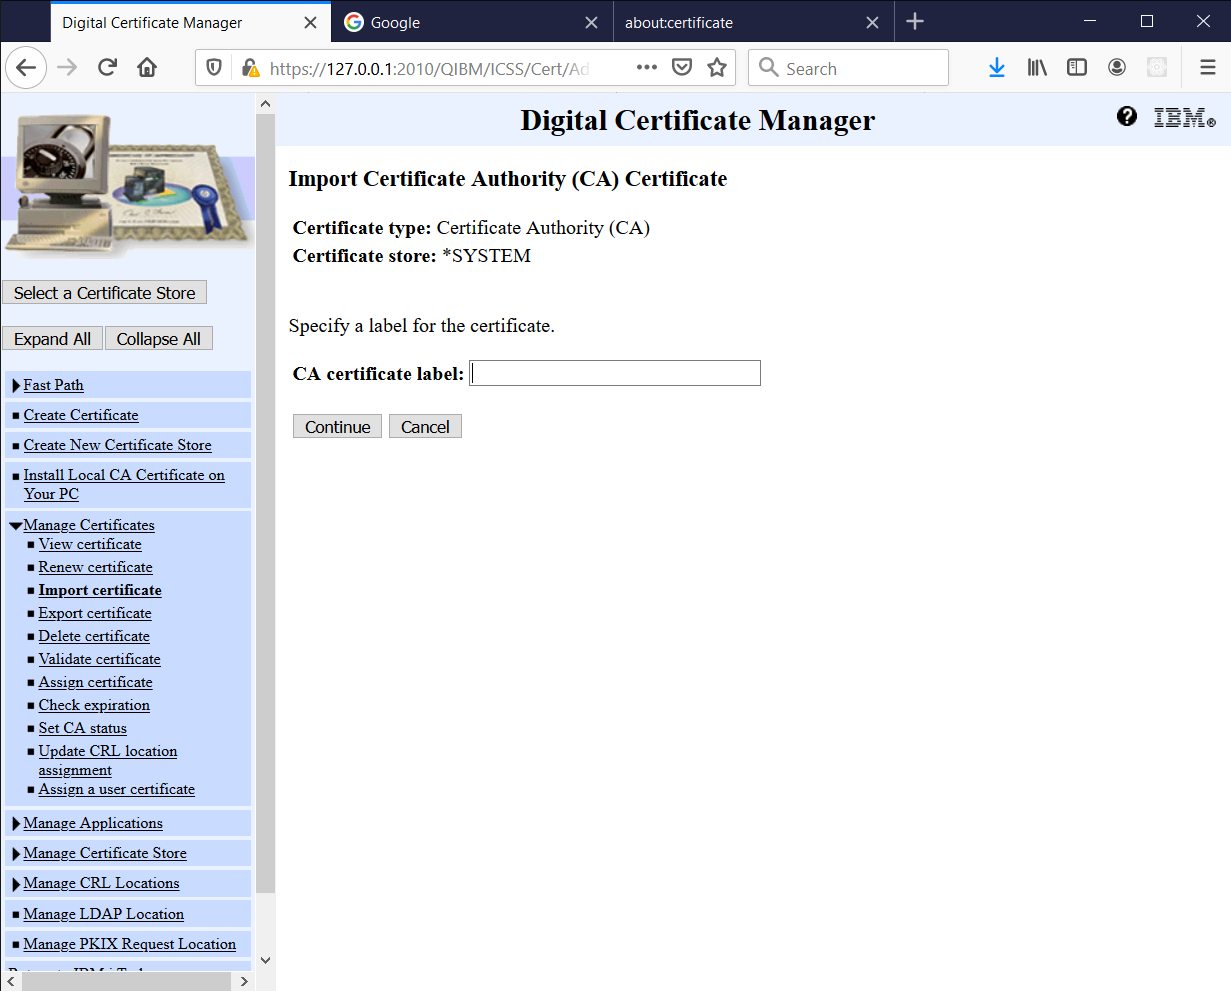
12. Enter certificate label for imported CA (up to you, don't have to be the same as CA common name):
13. Press Continue:
Certificate imported.

